
Continuing on with the series on photography, the Introduction gave us an overview of what makes photography important in our lives, the roles that photography can play in effectively helping us tell our own personal stories. We looked at how simply through photos you can build a legacy, move people, and spark conversations without a word spoken.
But how do we go about taking those photos? First, we start by learning about a few sort of “rules” of photography. We are visual people and there are certain things that come naturally to our eye. By understanding the basics, you can create photographs that are visually appealing to a large demographic of people. It doesn’t matter if you are using your DSLR or simply your iPhone. These basic rules apply to all photography. Start by learning these rules one by one and then practice them. Soon they will become second nature and you will feel comfortable breaking them or using a mixture of them together to create visually appealing photos.
Composition

When we talk about visual arts, we talk a lot about things like composition and creating a photo that allows the viewer to travel throughout the photo. There needs to be something that draws the viewer into the photo (subject) and then elements that draw their eye around the photo. It’s also important to give the viewer a place to rest their eye.. If there is too much going on in a photograph, it will be hard for your viewer to focus for a long time on your image or they may be focusing their attention on something other than your subject.

Creating a good composition in camera will save you time later on. It’s best to try and get the best images in camera you can versus trying to make an okay image better through editing software. Today with digital cameras, we are given so many times to press the shutter that I think composition is something that has gotten lost in photography. Whereas when we shot film, we were limited on exposures. We had to make it count. A great way to practice nailing good compositions is to shoot with film. Or take your digital camera and pretend you are shooting film. Slow down, visualize, and take your time to compose your shot.
Rule of Thirds

If you were to draw two evenly spaced horizontal and vertical lines on your photo, you would essentially have the rule of thirds. Through the grid the rule of thirds creates, it gives us four important places to put the subject or a point of interest in your photo. The rule of thirds also gives us four lines for points of interests to follow. Say you are photographing a road, compose the photo so that the road recedes on one of those lines. The theory behind the rules of thirds is that it creates balance in your photo as well as allows the viewer to interact with the photo in such a way that is naturally pleasing to the eye.
 Try to avoid positioning things, especially people, in the dead center of the photo. Positioning your subject in the dead center of a photo looks awkward. The viewer’s eyes naturally go to one of the intersection points created by the rule of thirds rather than the center.And honestly, as a person who enjoys photography and visual arts, it makes me cringe to see people positioned in the dead center. There is a time and a place for subjects in the dead center. But for right now, abide by the rule of thirds. Recompose, shift to the left or right, and if you forget, you can always crop your photo later on to follow the rule of thirds. If you are able to, place your subject’s eyes along one of the intersection lines or points. Eyes are a natural point of focus for viewers. If you are unable, placing your subjects head or body along one of the lines is best.
By using the rule of thirds, your photos will become more interesting but also more visually pleasing to your viewers.
Fill Your Frame
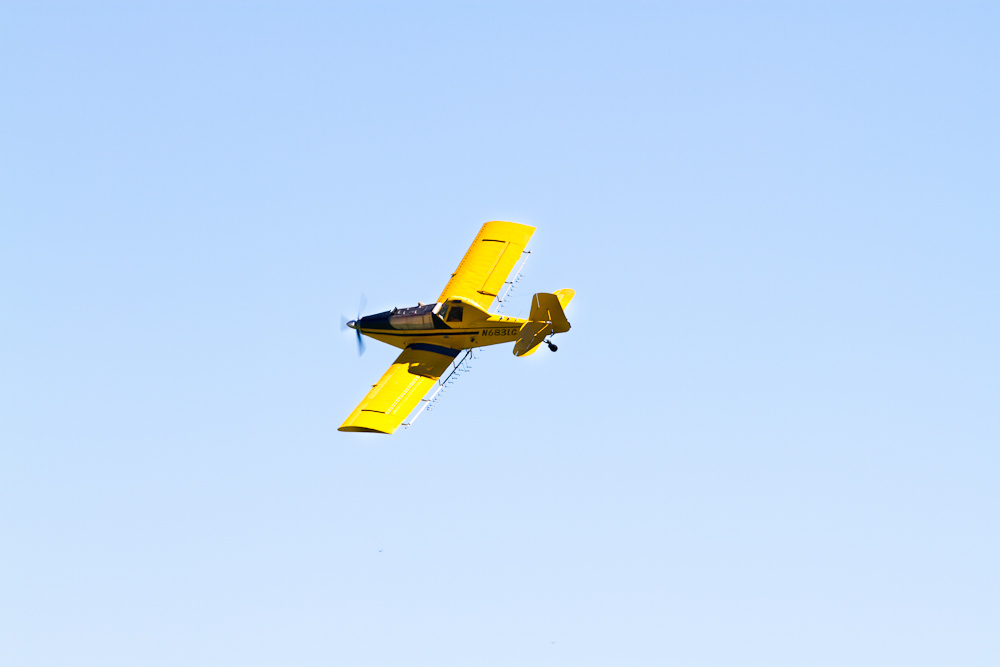
I see this one an awful lot in photographs. Here’s the scenario: either the viewer has to squint to make out the subject of photo OR the viewer isn’t really sure what the photographer was going for because the subject doesn’t fill the frame. In the example above, I had limited factors. He was too far up in the sky and I couldn’t zoom any closer. The airplane doesn’t fill the frame and it really doesn’t make for a good photo. If you are in a situation where you have limiting factors in filling the frame, just don’t take the photo. We are trying to make beautiful photos and use them to tell our story. Fill the frame.

When we fill the frame, our subjects come alive. It tells a story. The plane filling the frame makes for a much more interesting and dynamic photo. Viewers like seeing a subject’s expressions, they like seeing movement like in this photo the airplane is spraying. How can we fill the frame? Use your zoom and get in closer. If your zoom doesn’t work or compromises image quality, physically move and get in close. If you can’t do either one, there is always cropping later on. But be careful trying to crop to fill the frame because your image quality may be compromised using this method as well.
Look at the Background, Keep it Simple
There is nothing worse than coming away from a shoot feeling pleased with your images.. Until you get home and realize behind your subject there is an awful eye sore that your eye goes directly to. It happens to the best of us, we get in the moment, focus on our subject, and forget to look beyond them. Don’t forget to check what is in your background. Often times you can salvage a photo by simply taking one step to the right or left or even asking your subject to move.

Sometimes when it comes to backgrounds, simple is best. You get complex and ornate backgrounds and your viewer gets distracted on what they are supposed to be looking at. By simplifying the background or even if you want to get technical, throwing it out of focus, it gives the viewer a definite point of focus. A beautiful photo doesn’t have to have an elaborate and extremely planned background. Sometimes simple is better. Don’t be afraid to simplify your photos and focus on what matters, your subject.
Explore Angles
An easy and effective way to add interest is to change your angle! Often times images that are short at eye level leads to boring and uninteresting images. Change the angle from which you view your subject. Changing the angle can impact the size of your subject (make someone appear taller or shorter) and effect how light and shade work together on your subject.

Change your perspective by lying or crouching down which was how I achieved the sun burst image above. I am constantly doing this and often times in public it makes for some awkward looks from some people. 😉 Climb above things, get on top of the back of a pickup or rock. Put the camera on the ground and take a few shots. Don’t be afraid to experiment. Look up, look down, move around.
Make Sure Horizons are Horizontal
 Crooked images are one of my pet peeves. I see this one ALL THE TIME, especially out of people who view themselves as professional photographers. I am not sure what the allure to a crooked photo is, maybe artistic license. The first problem you are going to run into is that it is extremely difficult to frame a crooked photo because what way do you frame it? And secondly, crooked horizons make it seem like your subject is falling off of the frame. It just doesn’t look natural. It seems like a simple concept but you’d be surprised how often you don’t realize your horizon line when you are “in the zone”. Make sure your horizons are horizontal and straight as you are composing. Or you can always fix it post production.
Creating Space for Movement

When you are photographing things that are in motion, give them space to “move into” in the frame. By doing this, you are giving your subject active space. When a viewer looks at your subject in motion, our eyes naturally move in the same direction. By giving the viewer somewhere for their eye to travel within a photo, it creates a visually pleasing photo. We also view photographs much like we read a book. Since here in the U.S. we read left to right, we also view photos left to right. Keep this in mind when composing photos. If you forget, you can always reflect it in Photoshop but this doesn’t always work.
These are just the few basics when it comes to achieving visually pleasing images. But the important part is not take these “rules” to seriously. Learn them, practice them, use them together, and don’t be afraid to break them once in a while. Photography is so much more than just about the final result… Slow down, take your time, visualize your composition, and enjoy the process.
Do you have any more “rules” of photography you follow?
Next Week: Aperture & Shutter Speed
Using Photography to Tell Your Story Series:
Introduction
Photography Q&A with Jenny


Jenny, I am really enjoying the photography series. I just bought my first DSLR and I am excited to learn about photography! Keep the posts coming!
Good stuff! Will keep some of these points in mind. I am happy to say I do some of these tips subconsciously but a lot I need to work on 🙂
I think I might look at my composition a little differently from now on… thank you!!
Author
YAY! I am so glad people are utilizing these lessons!!!