
If you’ve followed me on any outlet of social media, you’ve probably noticed that every waking moment of free time lately has seemingly gone towards either sanding, staining, painting, or varnishing some piece of wood in our house. While it has certainly been a lot of work, we are glad we took the time to do these things now versus later. For the last couple weekends, the latest project has been finishing rough cut cedar beams for our living room ceiling.
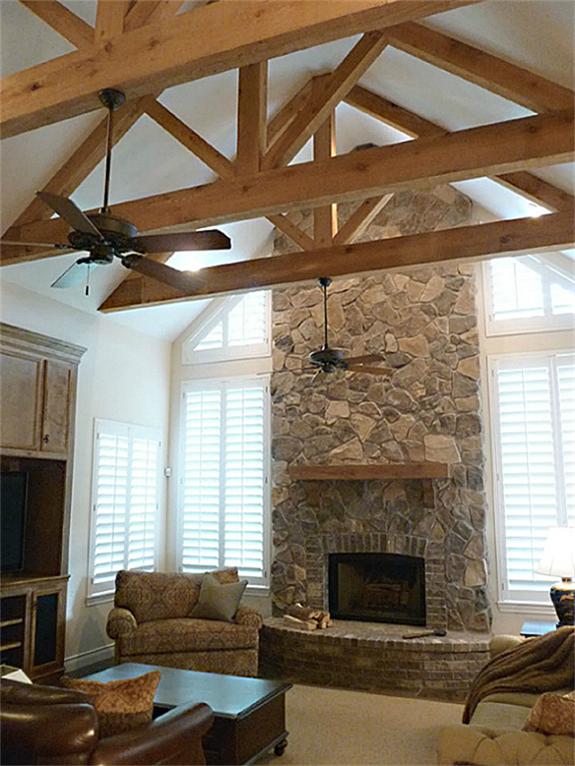
When we first sat down to design our home, we knew we wanted some exposed wood beams in the architecture somehow. Both the hubs and I love the look of that. We decided on vaulting our living room ceiling and including some architectural beam work. The cedar beams are also repeated both in our outdoor porch and front porch.
An inspiration for our home came from something like this:
 When we decided we wanted to do this, we didn’t think about who was going to seal the wood. It was not a requirement, we could have use raw, rough cut beams. But to keep moisture, dust, etc. out as well as maintain the integrity of the wood as it ages, we needed to seal them. And that job ended up falling on us. I will say this was a job that was much easier said than done. It wasn’t entirely too technical, it just took a lot of time and steps.
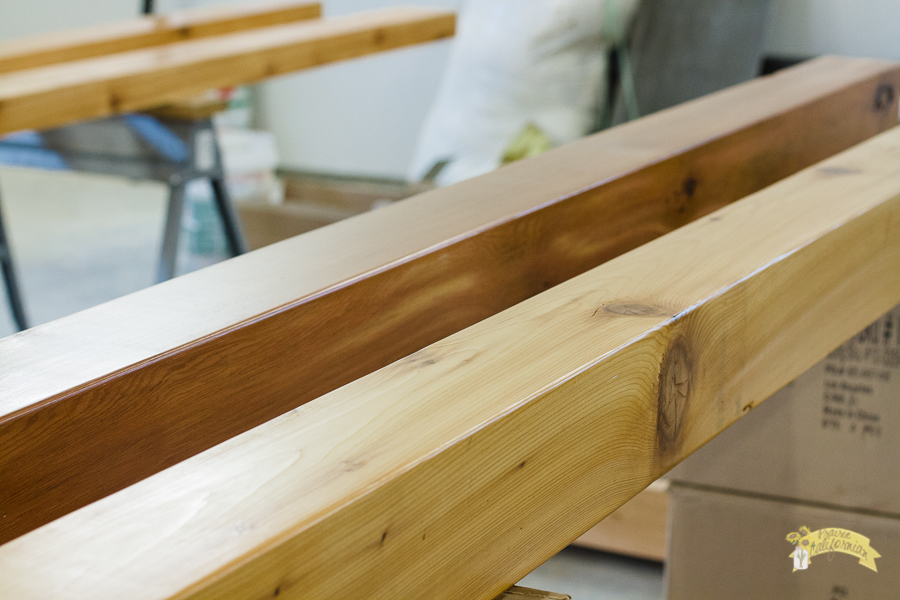
When I posted a photo of the process on Facebook, I was asked if I would do a little tutorial on how we did this, so here we go! Finishing beams DIY!
First, let’s start with the materials…
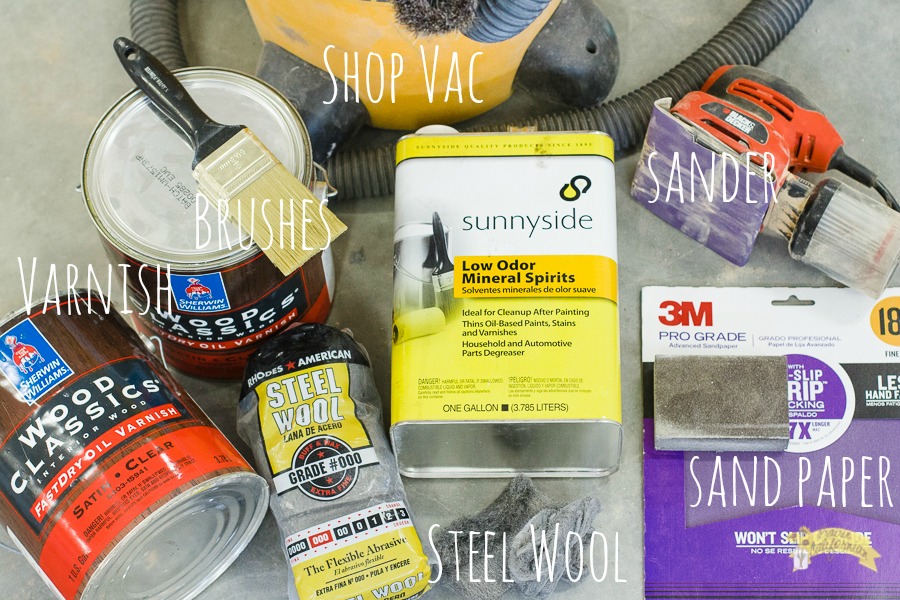
Materials Needed:
- Varnish or Poly Sealer – I used Sherwin Williams Wood Classics Interior FastDry Oil Varnish
- 2 inch brush – I recommend Purdy XL brushes
- Steel Wool – I used 000 grade
- Power Sander – I used a 1/4 sheet orbital sander made by Black & Decker
- Sandpaper – I used 100 grit for most of the project
- Shop Vac
- Mineral Spirits
Some additional things you may want to pick up:
- Rubber or latex gloves
- Respirator or mask
- Saw horses or drop cloths
- T-shirt rags
The Process:
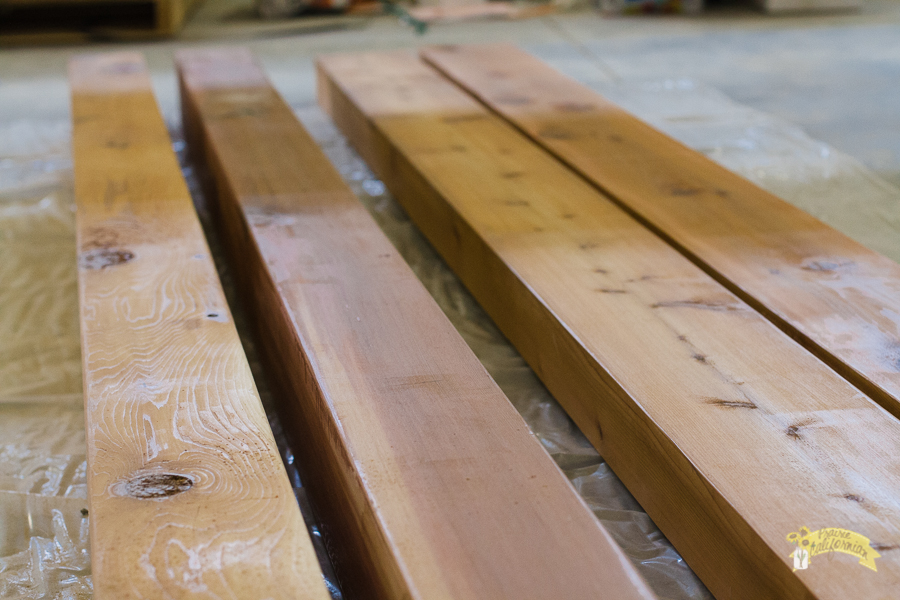
For our project, we chose to use cedar beams. I’ve found there is quite the variation between cedar in both color and texture. So before you choose a wood, you may want to do some research on which species is best for your project. We enjoy the variation in both color, texture, and knots so the cedar has been a wonderful choice for us.
When our beams first came to us, they were what is called rough cut. Basically, they were rough. They had rough edges, some splinters, some imperfections, and some small damages from shipping. Sanding fixed most of these issues and left me with a smoother surface to varnish. I was honestly amazed at the difference from rough cut to just sanding.

I used the orbital power sander versus trying to hand sand all of the beams. I picked it up from Amazon for another project and was glad I had it. A belt sander would have worked even better, but I used the tools I had on hand. I pre-cut most of my sandpaper sheets before I started so when the sandpaper got too fine or ripped, I could easily change out sheets without having to stop for too long.
Sanding the beams was a MESSY job and created a TON of dust that settled on everything in the vicinity. I was in our garage, but I recommend if you can, sand outside as it makes for easier clean up. You will also want to potentially wear a mask or respirator so you can’t suck up all the fine dust. Once the beams were sanded to my liking, I used the shop vac to clean them and vacuum up all the dust off of the beams and the surrounding areas.
If you are wanting to stain the beams, now would be the time to stain them. I have a whole other tutorial I plan on putting up about staining with some tips/tricks.
You will want to ensure you’re in a dust-free zone before heading to the varnishing step as dust in the varnish will cause bubbles and other imperfections on your nicely sanded beams. If you don’t need to sand, you’ll also want to ensure your wood is clean and dry before varnishing. We used the same varnish we used on our windows after we stained them. It is Sherwin Williams brand FastDry Oil Varnish. I had never worked much with varnish before and if you’re like me.. Let me tell you, a little bit goes a long way.

This stuff is like spreading honey on the beams. It is goop-y, sticky, and thick so use it sparingly. I found a 2 inch flat brush worked great for the size beams I was doing, feel free to use whatever size works for you. I did find that when my brush was having a hard time pulling across the surface, I would wet it in some mineral spirits and then wipe the excess off. This helped thin the varnish a little bit throughout the varnishing process.
The varnishing process went as follows: sand, varnish, light sand, varnish. Basically varnish twice with a light sand in between.
The can states that the varnish dries within a matter of four hours before you can sand again. Because of the time of day I was working on this, I didn’t have four hours to wait so I let my beams sit overnight between coats of varnish. Do not worry if there are minor imperfections on the surface. When I applied the first coat and it dried, I was devastated because it was full of bumps and really rough to the touch. Never fear, the light sand in between will fix this.
Once the varnish is dry to the touch and no longer tacky at all, you can lightly sand. Sherwin Williams recommended that we use a super fine grit sandpaper like 220, however, our builder gave us the idea to use steel wool. We picked up 00 grade and 000 grade. I liked using the 000 grade the best. I found the steel wool was much easier to work with and didn’t scuff up the surface of the wood as much as the sandpaper did.
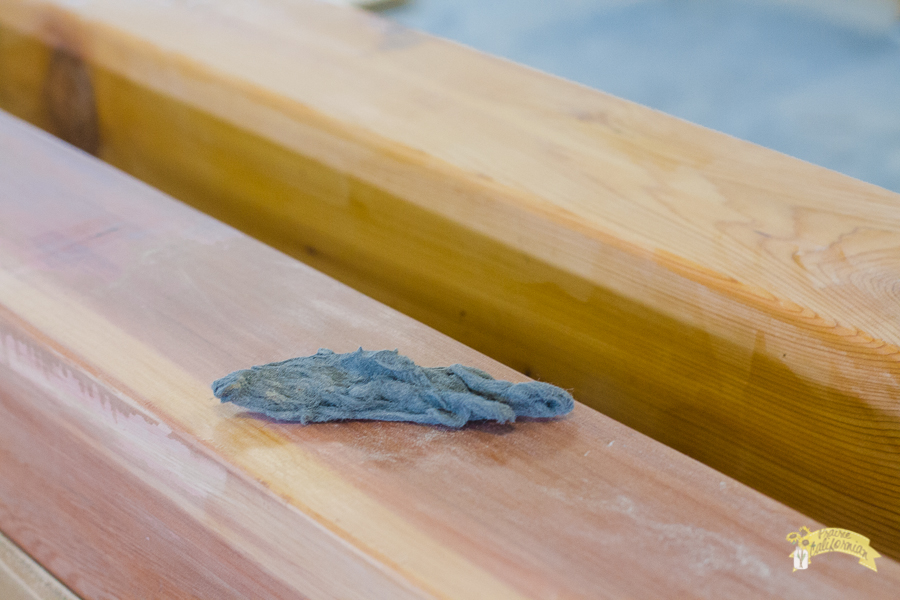
I did use gloves when using the steel wool just to ensure that I didn’t burn my hand or get splinters in my fingers running the steel wool across the beams. Once you’ve completely gone over the beams with the steel wool, when you run your hand down the beams, they should be smooth. All those bumps left from the varnish will be gone. If there are any imperfections, give them a little elbow grease with the steel wool or use a rougher grain. I did use the sand paper to remove some drips, etc. left by the varnish. Don’t worry if the beams look dull, mine looked really dull and lost that sheen from the varnish.
Once the beams have been lightly sanded, use the shop vac again to get rid of any dust left. Then it is time to varnish again! I found during the first varnish, I had to load up my brush as the wood really soaked in the varnish. The second time I used the varnish much more sparingly as it wiped onto the surface much easier.
When you are all finished, we used the mineral spirits to clean up the brushes. After the second varnish is dry, you should be left with smooth, sealed beams that are ready to use in your household project! And the beauty of working with wood is that if at any point, you feel like you’ve messed up, sand and start over. Sanding can cover a multitude of sins!
There you go! DIY finishing beams! I was honestly shocked at how simple this whole process was. Throughout the process, I was afraid I would mess the beams up but I am extremely happy with the results. They are beautiful and they haven’t even been put up in our home yet! I promise to share an after photo once they are up in our living room!

These look so good!! I am wanting to tear down the wall between our kitchen and living room and put up a wood beam for support! Thank you for the tutorial!
Jenny, that is simply beautiful. I wish I had had you around when I was having my home built almost 10 years ago; but I am not too dissatisfied with the results my kids and builder did on mine, just a few minor things. I was sick during a lot of the building phase of it from start to finish.. Do keep us posted on the progress. Do you know when you might begin to see that great day? Take Care!!